In this blog we will learn about how to adopt service mesh to applications that are deployed in Kubernetes cluster and also we will look into benefits of adopting that service mesh in Kubernetes cluster.
Introduction to Service Mesh:
A service mesh is a networking infrastructure layer that helps manage and facilitate communication between microservices in a distributed application. In a microservices architecture, applications are broken down into small, independent services that communicate with each other to perform various functions. Service mesh technology provides a way to handle the complexities of service-to-service communication, including load balancing, security, monitoring, and resilience.
Why do I need a service mesh?
1.Secure communication among services

Communication from external world to Kubernetes cluster

Communication among pods in Kubernetes cluster without service mesh
A request from external world to Kubernetes cluster is secured via firewall. But inside the Kubernetes cluster the communication among pods are not secured. This poses a very serious threat to the overall security to the application. So to secure a communication among pods we are implementing service mesh.
2.Fasten the communication among the services
To ensure fast communication among services, developers have additional responsibility of writing a business logic in code itself. Service Mesh will provide various business logic such as routing rule, retries, failover and fault injection which will fasten the communication among services.
3.Monitoring Logic
Applications which are deployed in Kubernetes cluster should be monitored. It should monitor the performance and logs of deployed application. Service mesh will provide the monitoring logic which will monitor the performance of deployed application .

Introduction to Istio
Istio is an open source service mesh that layers transparently onto existing distributed applications. Its powerful control plane provides the following features such as
- Secure service-to-service communication in a cluster with TLS encryption, strong identity-based authentication and authorization
- Automatic load balancing for HTTP, gRPC, WebSocket, and TCP traffic
- Fine-grained control of traffic behavior with rich routing rules, retries, failovers, and fault injection
- A pluggable policy layer and configuration API supporting access controls, rate limits and quotas
- Automatic metrics, logs, and traces for all traffic within a cluster, including cluster ingress and egress
Getting Started with Istio
Istio is an open source service mesh. Here we are going to see how to install istio in the running Kubernetes cluster.
Download Istio
- Download and extract the latest release automatically. curl -L https://istio.io/downloadIstio | sh – . The command above will download the latest release of istio. If you want to download the specific version the you can use the following command curl -L https://istio.io/downloadIstio | ISTIO_VERSION=1.19.1

2. Move to the Istio package directory. For example, if the package is istio-1.19.1:
cd istio-1.19.1
The installation directory contains:
- Sample applications in samples/
- The istioctl client binary in the bin/ directory.

3.Add the istioctl client to your path. export PATH=$PWD/bin:$PATH

Install Istio
- For this installation, we use the demo configuration profile. It’s selected to have a good set of defaults for testing, but there are other profiles for production or performance testing.

2.Add a namespace label to instruct Istio to automatically inject Envoy sidecar proxies when you deploy your application later.

Deploying Application
Deploy the application in the istio injected namespace. Here we have injected istio in namespace micro-services.

After deploying application in that namespace the istio is running as a sidecar.
Next deploy a kiali so that we can easily view the running application in dashboard.

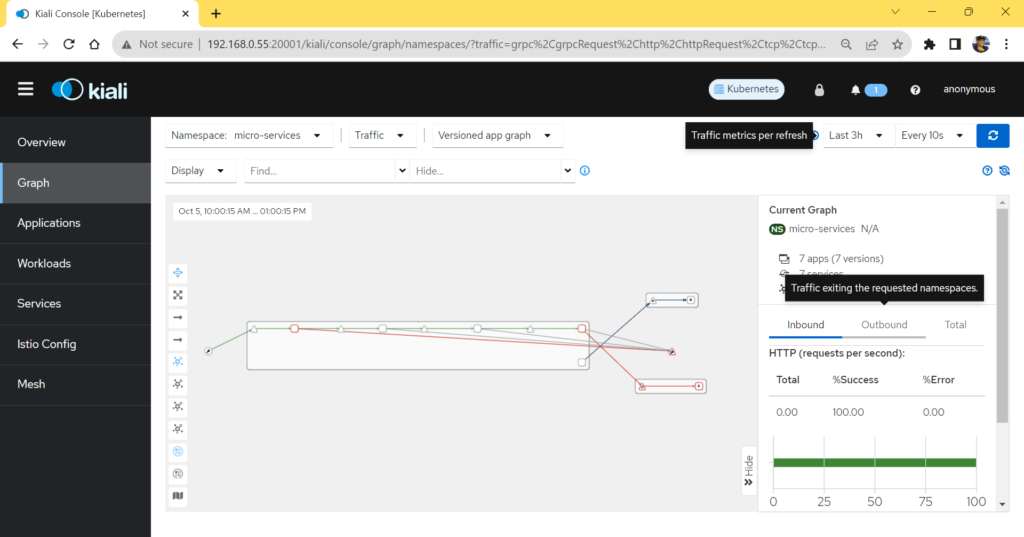
View the kiali dashboard using the following address http://<External-ip>:<port>. Here the address is http://192.168.055:20001


In this dashboard you can view information about the deployed application. %success and %Error for the Http request made into the application.


